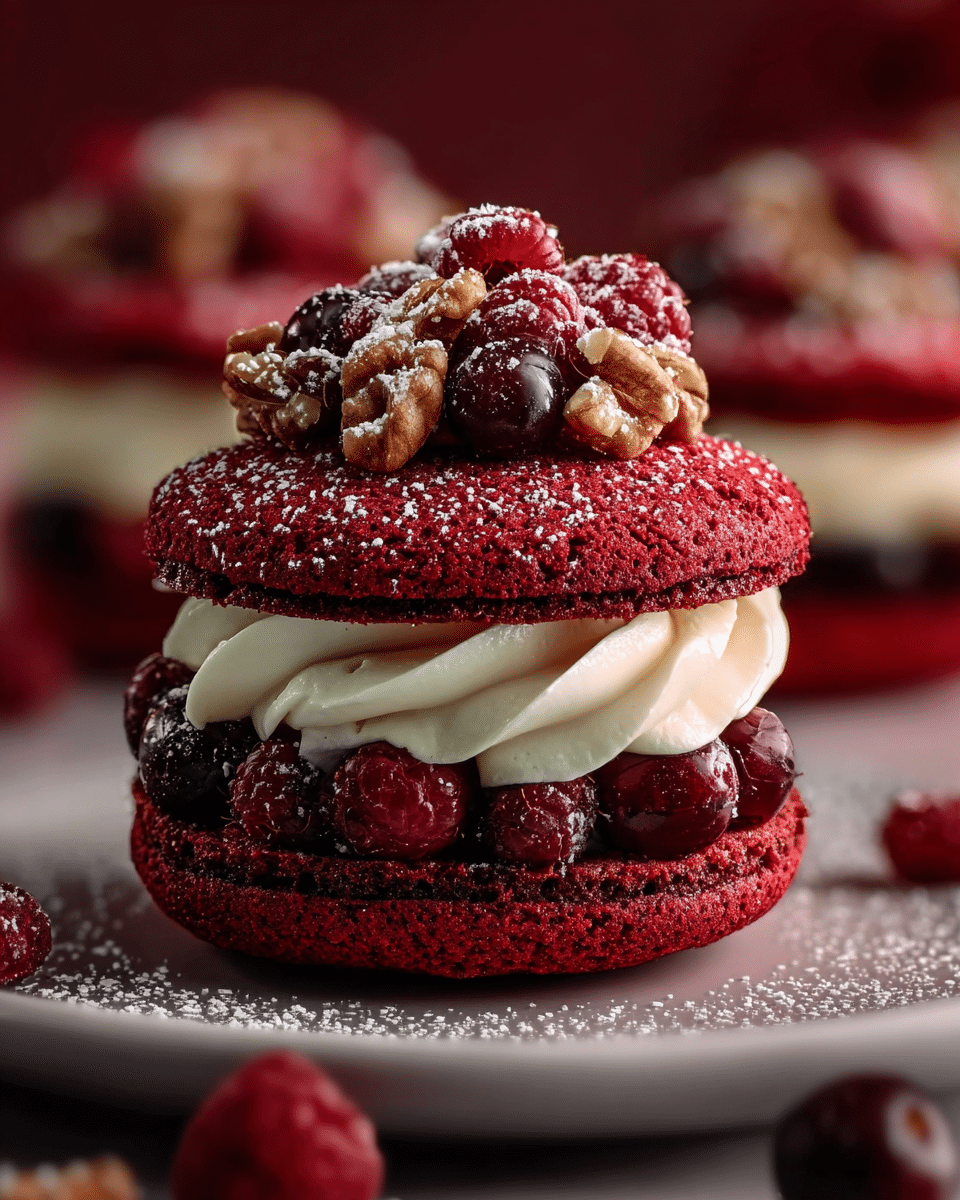
Are you tired of flat, uninspiring desserts that lack that special touch? The Couronne Rouge Velours Tartes Whoopie is about to change your dessert game forever! These royal red velvet whoopie tarts crowned with luxurious frosting deliver a melt-in-your-mouth experience that will impress even the most discerning sweet tooth.
Hi, I’m Michael, the heart behind Foodydish! As someone who’s tested countless dessert recipes in my kitchen, I’ve perfected these velvet whoopie tarts through years of experimentation. The vibrant red color paired with the plush texture creates a dessert worthy of its royal name “couronne rouge.”
In this guide, I’ll walk you through selecting the perfect ingredients, mastering the velvety texture, and creating that signature crown shape that makes these whoopie tarts truly special. Get ready to discover baking tips, flavor variations, and presentation ideas that will elevate your dessert game!
Why This Couronne Rouge Velours Tartes Whoopie Recipe Works
These aren’t your ordinary whoopie pies! The Couronne Rouge Velours Tartes Whoopie stands out for several reasons:
- Uses simple pantry ingredients transformed into elegant French-inspired desserts
- Perfect balance of sweetness and texture in just 45 minutes of active preparation
- Versatile for casual family desserts or sophisticated dinner party finales
- The crown-shaped design creates an Instagram-worthy presentation every time
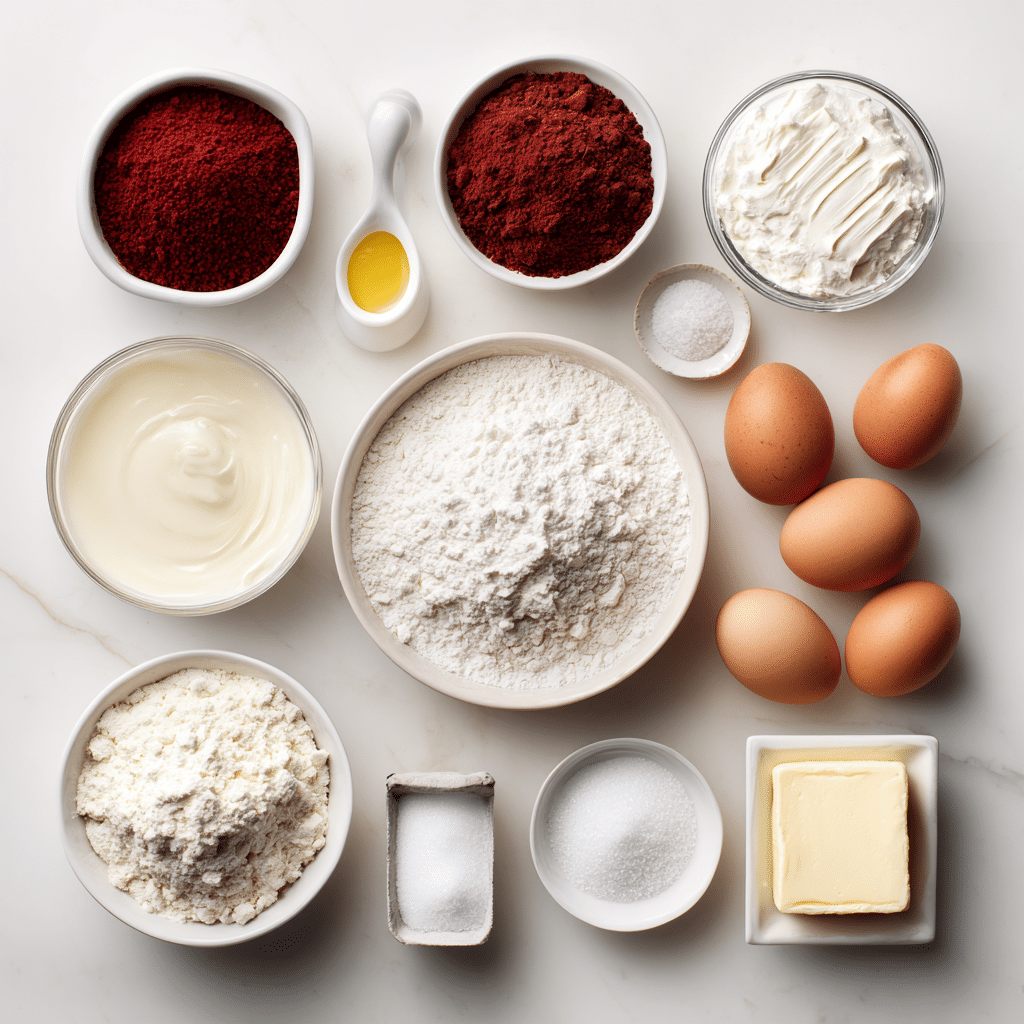
Choosing the Right Ingredients for Couronne Rouge Velours Tartes Whoopie
Best Quality Components for This Recipe
The secret to exceptional Couronne Rouge Velours Tartes Whoopie lies in selecting high-quality ingredients:
- Cocoa Powder: Use Dutch-processed cocoa for deeper color and smoother flavor
- Red Food Coloring: Gel-based colors provide vibrant hue without affecting texture
- Buttermilk: Essential for tenderness and that signature velvet texture
Buying Tips
For bakery-quality results:
- Choose unbleached all-purpose flour for better structure
- Opt for real vanilla extract, not imitation
- Room temperature dairy ingredients ensure better incorporation
- Fresh baking powder and soda guarantee proper rise
Substitutions
Can’t find or prefer not to use certain ingredients? Try these alternatives:
- Greek yogurt works beautifully in place of buttermilk (use 1:1 ratio)
- Natural red coloring alternatives include beet powder or reduced beet juice
- Gluten-free flour blends can replace all-purpose (look for ones with xanthan gum)
Ingredients & Prep for Couronne Rouge Velours Tartes Whoopie
Tart Shell Essentials
- 2 cups all-purpose flour
- 3 tablespoons unsweetened cocoa powder
- 1/2 teaspoon baking soda
- 1/2 teaspoon salt
- 1/2 cup unsalted butter, softened
- 1 cup granulated sugar
- 1 large egg, room temperature
- 1 tablespoon red food coloring (gel preferred)
- 1 teaspoon vanilla extract
- 3/4 cup buttermilk
Crown Frosting Components
- 8 oz cream cheese, softened
- 1/4 cup unsalted butter, softened
- 2 cups powdered sugar, sifted
- 1 teaspoon vanilla extract
- Pinch of salt
- Gold sprinkles or edible gold dust (for the royal touch!)
Pantry Staples
- Parchment paper for lining baking sheets
- Piping bags with star tips for decorative crowns
- Cooling racks for perfect texture
Step-by-Step Couronne Rouge Velours Tartes Whoopie Instructions
Pre-Cooking Prep for Couronne Rouge Tarts
- Preheat your oven to 350°F (175°C)
- Line two baking sheets with parchment paper
- In a medium bowl, whisk together flour, cocoa powder, baking soda, and salt
- Bring all refrigerated ingredients to room temperature for 30 minutes
Baking Method for Perfect Velours Tarts
- In a stand mixer, cream butter and sugar until light and fluffy (about 3 minutes)
- Beat in egg, then add red food coloring and vanilla extract
- Gradually add dry ingredients alternating with buttermilk, beginning and ending with dry ingredients
- Pipe or spoon 2-inch circles onto prepared baking sheets, leaving 2 inches between each
- Bake for 10-12 minutes until tops spring back when lightly touched
Doneness Check for Couronne Rouge Whoopie Tarts
- Edges should be set but centers still slightly soft
- A toothpick inserted should come out with a few moist crumbs
- The vibrant red color should remain intact without browning
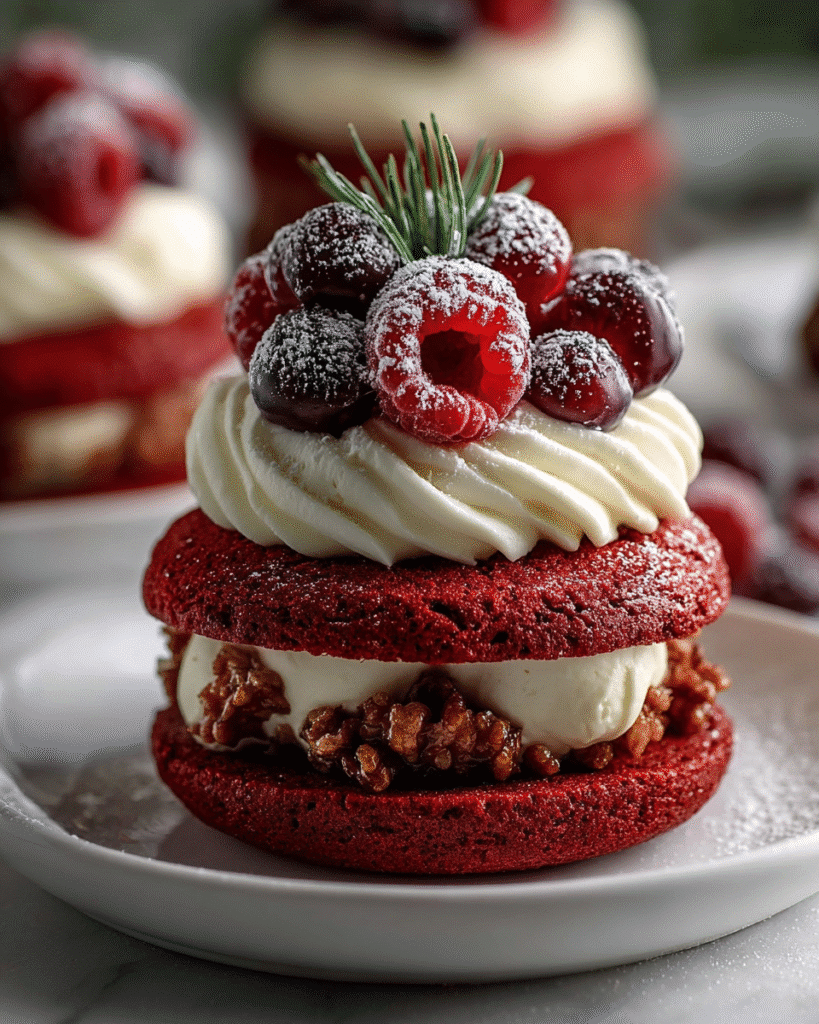
Cooling and Assembly of Velours Tarts
- Allow tarts to cool on baking sheets for 5 minutes
- Transfer to cooling racks and cool completely before filling
- For the filling, beat cream cheese and butter until smooth
- Gradually add powdered sugar, vanilla, and salt until fluffy
- Pipe frosting in a crown pattern on half the tarts, then sandwich with remaining halves
Pro Tips for Perfect Couronne Rouge Velours Tartes Whoopie
Avoiding Common Couronne Tart Mistakes
- Don’t overmix the batter after adding dry ingredients – this causes tough tarts
- Keep tart sizes consistent for even baking and beautiful presentation
- Refrigerate the batter for 15 minutes before piping for sharper crown shapes
Tool Recommendations
- Use a kitchen scale for precise measurements
- Silicone mats provide even baking and perfect shape
- Crown-shaped piping tips create authentic “couronne” designs
Storage & Serving
- Store assembled tarts in airtight containers in the refrigerator for up to 3 days
- Bring to room temperature for 20 minutes before serving for best flavor
- Unfilled tarts can be frozen for up to 1 month in airtight containers
Looking for more dessert inspiration? Check out my collection on Pinterest for stunning visual ideas that will take your baking to the next level!
Flavor Variations for Couronne Rouge Velours Tartes Whoopie
Seasonal Twists
- Winter Spice: Add 1 teaspoon of cinnamon and a pinch of nutmeg to the batter
- Summer Berries: Fold fresh raspberries into the filling for tartness
- Autumn Harvest: Incorporate maple extract into the frosting (½ teaspoon)
Special Dietary Options
- Reduced Sugar: Replace half the sugar with monk fruit sweetener
- Dairy-Free: Use plant-based butter and coconut cream cheese alternatives
- Egg-Free: Substitute egg with 1/4 cup applesauce plus 1/2 teaspoon baking powder
Global Inspirations
- French Touch: Add 1 tablespoon orange zest to the batter
- Mediterranean: Incorporate 1 teaspoon rosewater into the frosting
- American Classic: Fold mini chocolate chips into the batter
| Variation | Flavor Profile | Prep Time | Difficulty |
|---|---|---|---|
| Classic Couronne | Rich cocoa, subtle tang | 45 min | Beginner |
| Citrus Crown | Bright, zesty undertones | 50 min | Intermediate |
| Double Chocolate | Intense, decadent | 45 min | Beginner |
| Berry Infused | Sweet-tart balance | 60 min | Advanced |
Serving Suggestions for Couronne Rouge Velours Tartes Whoopie
- Arrange on a tiered cake stand for an elegant dessert table centerpiece
- Pair with fresh berries and mint leaves for color contrast
- Serve with vanilla bean ice cream for a deluxe dessert experience
- Dust with powdered sugar just before serving for a snow-kissed appearance
- Match with hot beverages like French vanilla coffee or Earl Grey tea
FAQs About Couronne Rouge Velours Tartes Whoopie
Q: Can I make the Couronne Rouge Velours Tartes Whoopie ahead of time?
A: Yes! You can prepare the shells up to 3 days in advance and store in an airtight container. Assemble with filling up to 24 hours before serving.
Q: Why did my tarts spread too much during baking?
A: This usually happens when butter is too warm or there’s too little flour. Chill your batter for 15-20 minutes before piping.
Q: How do I achieve that vibrant red color without using too much food coloring?
A: Start with Dutch-processed cocoa which has a darker base, and use gel food coloring which is more concentrated than liquid varieties.
Q: Can I freeze these whoopie tarts?
A: Yes! Freeze unfilled tarts for up to 1 month. Thaw at room temperature and add filling before serving.
Conclusion
The Couronne Rouge Velours Tartes Whoopie isn’t just a dessert it’s an experience that brings the elegance of French patisserie into your kitchen. The contrast between the soft, crimson tart shells and the crown-like creamy filling creates a dessert that’s as beautiful as it is delicious.
I hope this guide inspires you to create these royal treats for your next gathering or special occasion. Remember, baking is about joy and creativity don’t be afraid to put your own signature spin on these velvet whoopie tarts!
Share your Couronne Rouge creations with our community of baking enthusiasts and let me know how they turned out. Happy baking, and as we say at Foodydish, let’s savor every bite, together!
Print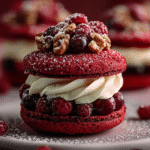
Best Couronne rouge velours Tartes Whoopie: Sweet Secrets Revealed!
- Total Time: 45 mins
- Yield: 12 Whoopie pies 1x
Description
Des mini tartes Whoopie rouges velours, douces, moelleuses et garnies d’une crème au fromage onctueuse une version élégante et festive du classique gâteau américain.
Ingredients
1 1/2 tasses de farine tout usage
2 c. à soupe de cacao non sucré
1 c. à café de levure chimique
1/2 c. à café de bicarbonate de soude
1/4 c. à café de sel
1/2 tasse de beurre doux, ramolli
1 tasse de sucre
1 gros œuf
1 c. à café d’extrait de vanille
1/2 tasse de babeurre
1 c. à café de vinaigre blanc
1 c. à soupe de colorant alimentaire rouge
**Garniture crème au fromage :**
4 oz (115 g) de fromage à la crème, ramolli
1/4 tasse de beurre doux, ramolli
1 1/2 tasses de sucre glace
1/2 c. à café d’extrait de vanille
Instructions
1. Préchauffez le four à 180°C (350°F) et tapissez une plaque de cuisson de papier sulfurisé.
2. Dans un bol, mélangez la farine, le cacao, la levure, le bicarbonate et le sel.
3. Dans un grand bol, battez le beurre et le sucre jusqu’à consistance légère et mousseuse.
4. Ajoutez l’œuf et la vanille, puis incorporez le colorant rouge et le vinaigre.
5. Ajoutez le mélange sec en alternant avec le babeurre, jusqu’à ce que la pâte soit homogène.
6. Déposez des cuillerées de pâte sur la plaque et aplatissez légèrement.
7. Faites cuire 10 à 12 minutes jusqu’à ce que les bords soient pris.
8. Laissez refroidir complètement.
9. Pour la garniture, battez le fromage à la crème et le beurre jusqu’à consistance lisse.
10. Ajoutez le sucre glace et la vanille, puis fouettez jusqu’à obtenir une crème épaisse.
11. Garnissez la moitié des biscuits avec la crème, puis assemblez avec les autres pour former les Whoopie pies.
Notes
Pour une touche gourmande, roulez les bords des Whoopies dans des miettes de biscuits ou des pépites.
Conservez-les au réfrigérateur dans un contenant hermétique jusqu’à 3 jours.
Parfaits pour la Saint-Valentin ou les fêtes.
- Prep Time: 20 mins
- Cook Time: 12 mins
- Category: Dessert
- Method: Baking
- Cuisine: Américaine
Nutrition
- Serving Size: 1 whoopie pie
- Calories: 290
- Sugar: 27g
- Sodium: 170mg
- Fat: 14g
- Saturated Fat: 8g
- Unsaturated Fat: 5g
- Trans Fat: 0g
- Carbohydrates: 38g
- Fiber: 1g
- Protein: 4g
- Cholesterol: 55mg
Keywords: whoopie pies, red velvet, mini tartes, biscuits à la crème, couronne rouge velours