Are you tired of soggy, uninspiring sandwiches that leave your lunch break feeling like a letdown? A perfectly crafted Crunchy Chicken Caesar Sandwich might be exactly what you need to revolutionize your midday meal. As the heart behind FoodyDish, I’ve spent countless hours perfecting sandwich recipes that transform ordinary ingredients into extraordinary culinary experiences.
When I first created this Crunchy Chicken Caesar Sandwich, it was for a family picnic where I needed something portable yet impressive. The combination of crispy chicken, fresh romaine, and zesty Caesar dressing was such a hit that my cousins still request it at every gathering!
In this guide, I’ll share five incredible variations of this classic sandwich that will tantalize your taste buds and elevate your lunch game. I’ll cover everything from selecting the perfect chicken cuts to assembling techniques that keep everything crunchy until the first bite.
Why This Crunchy Chicken Caesar Sandwich Recipe Works
- Uses readily available ingredients that transform into gourmet flavors
- Combines multiple textures: crispy chicken, crunchy romaine, and creamy dressing
- Prep components ahead for quick assembly on busy days
- Adaptable for various dietary preferences without sacrificing flavor
- Perfect for both casual lunches and impressive entertaining
Choosing the Right Chicken for Your Crunchy Chicken Caesar Sandwich
Best Cuts for This Recipe
For the ultimate Crunchy Chicken Caesar Sandwich, chicken breasts reign supreme. Their lean profile provides the perfect canvas for breading and creates that satisfying crunch we’re after. If you prefer more flavor, boneless chicken thighs offer richer taste and stay juicier, though they require slightly different cooking times.
Buying Tips
Look for chicken that’s firm to the touch with a fresh, clean smell. If possible, choose air-chilled chicken rather than water-chilled varieties they crisp up better when cooking. For convenience, you can use thinly sliced chicken cutlets to reduce preparation time.
Substitutions
Don’t eat chicken? This sandwich concept works beautifully with crispy tofu slices, cauliflower steaks, or even portobello mushroom caps. Each alternative brings its own character while still complementing the Caesar flavors.
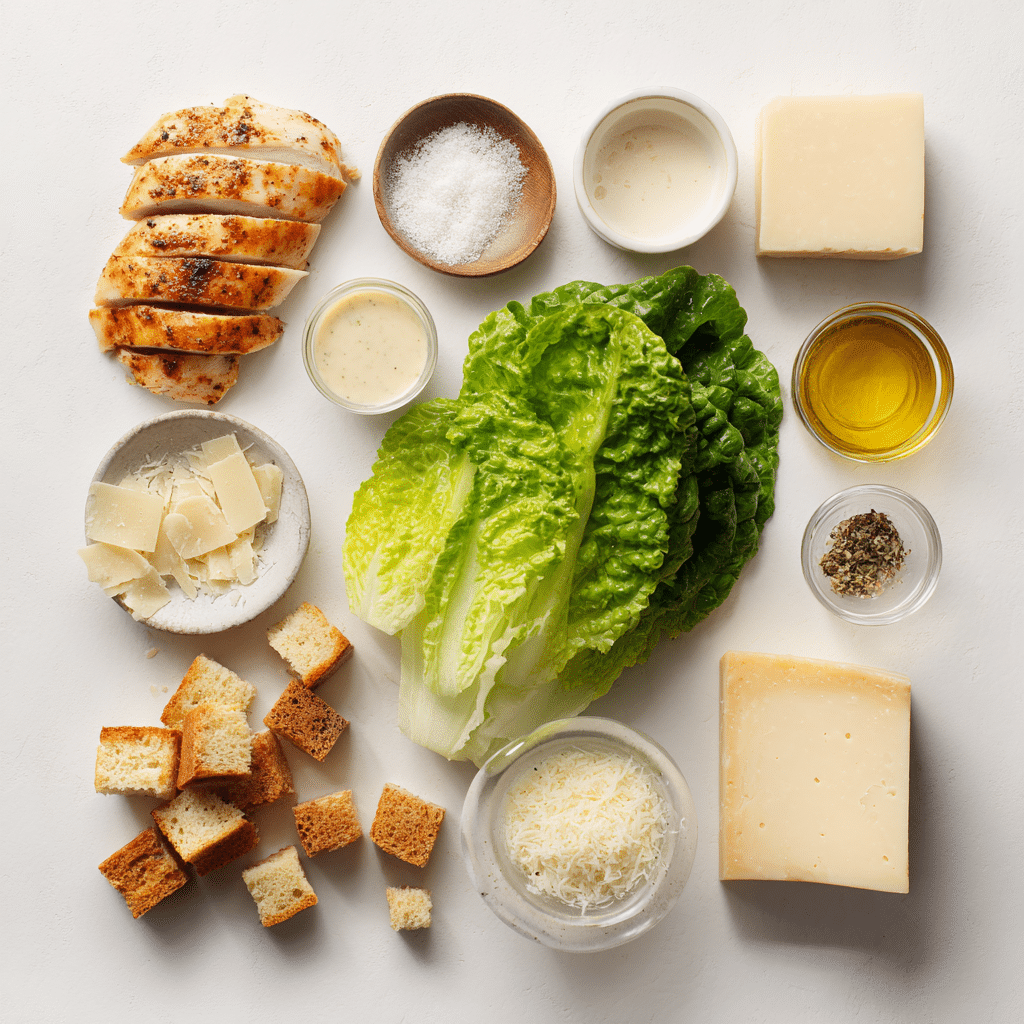
Ingredients & Prep for the Perfect Crunchy Chicken Caesar Sandwich
Chicken Prep Essentials
For consistently juicy chicken with maximum crunch, butterfly thicker chicken breasts or pound them to an even ½-inch thickness. This ensures even cooking and the perfect meat-to-breading ratio. Pat the chicken completely dry before breading moisture is the enemy of crispiness!
Breading & Seasonings
- For classic breading:
- All-purpose flour
- Eggs beaten with a splash of water
- Panko breadcrumbs
- Parmesan cheese
- Garlic powder
- Dried parsley
- Salt and pepper
Caesar Components
- Crisp romaine lettuce hearts
- Caesar dressing (homemade or high-quality store-bought)
- Freshly shaved Parmesan
- Crunchy croutons (store-bought or homemade)
- Fresh lemon wedges for serving
Step-by-Step Cooking Instructions for Crunchy Chicken Caesar Sandwich
Pre-Cooking Chicken Caesar Prep
- Set up your breading station with three shallow dishes: flour mixture in one, beaten eggs in another, and seasoned panko-Parmesan mixture in the third.
- Season your chicken with salt and pepper on both sides.
- Dredge each piece first in flour, then egg wash, and finally in the panko mixture, pressing gently to adhere.
- Let the breaded chicken rest on a wire rack for 10-15 minutes this helps the coating stick during cooking.
Cooking Method for Chicken Caesar Perfection
- Heat ½ inch of oil in a heavy skillet to 350°F (or until a breadcrumb sizzles when dropped in).
- Cook breaded chicken for 3-4 minutes per side until golden brown and internal temperature reaches 165°F.
- Alternatively, bake at 400°F for 20-25 minutes, flipping halfway through.
- For an air fryer version, cook at 375°F for 12-15 minutes, spraying lightly with oil before cooking.
Doneness Check for Chicken Caesar
Always use a meat thermometer to ensure chicken reaches 165°F at its thickest part. The outside should be golden brown and crispy, with no soft or pale spots in the breading.
Resting Your Chicken Caesar Components
Place cooked chicken on a wire rack, not directly on paper towels, to maintain crispiness. Let rest for 3-5 minutes before assembling sandwiches to help juices redistribute throughout the meat.
Pro Tips for Perfect Crunchy Chicken Caesar Sandwich
Avoiding Soggy Sandwich Syndrome
- Toast your bread or roll slightly before assembling
- Place a thin layer of mayonnaise on both bread slices to create a moisture barrier
- If packing for lunch, keep dressing and lettuce separate until ready to eat
- Layer crunchy elements away from moisture-heavy ingredients
Tool Recommendations
A heavy cast-iron skillet delivers the most even cooking and best crust for pan-fried chicken. Digital instant-read thermometers eliminate guesswork, while wire cooling racks maintain crispiness after cooking.
Storage & Make-Ahead Options
Prepare and store components separately for the freshest results:
- Cooked chicken stays crispy for up to 2 days when reheated in a 300°F oven
- Wash and thoroughly dry lettuce up to 3 days ahead
- Make extra breaded chicken to freeze (raw) for future quick meals
Looking for more sandwich inspiration? Check out our collection of creative lunch ideas on Pinterest where we share daily recipe inspiration to keep your meals exciting!
Flavor Variations for Crunchy Chicken Caesar Sandwich
Spicy Southwest Caesar
Transform your sandwich with chipotle powder in the breading and chipotle-lime Caesar dressing. Add sliced avocado and roasted corn kernels for a Mexican-inspired twist that brings heat and creamy texture.
Mediterranean Caesar
Incorporate Mediterranean flavors with oregano and lemon zest in the chicken breading. Top with sun-dried tomatoes, olives, and feta cheese crumbles instead of Parmesan for a tangy, briny variation.
Asian-Fusion Caesar
Create an umami-packed version with sesame seeds in the breading, plus a ginger-miso Caesar dressing. Add quick-pickled vegetables and crispy wonton strips for extra crunch and flavor complexity.
Herb Garden Caesar
Infuse fresh herbs like dill, basil, and chives into your breading and dressing. Add cucumber slices and microgreens for a garden-fresh take on the classic.
Breakfast Caesar
Who says sandwiches are just for lunch? Add a fried egg with runny yolk and crispy bacon to your Crunchy Chicken Caesar for a breakfast-meets-lunch masterpiece.
| Variation | Key Ingredients | Best Bread Choice | Perfect Side |
|---|---|---|---|
| Classic | Traditional Caesar, Parmesan | Ciabatta roll | Potato chips |
| Spicy Southwest | Chipotle, avocado, corn | Telera roll | Black bean salad |
| Mediterranean | Sun-dried tomatoes, feta | Focaccia | Greek salad |
| Asian-Fusion | Sesame, miso, pickled veggies | Milk bread | Edamame |
| Herb Garden | Fresh herbs, cucumber | Sourdough | Fresh fruit |
Serving Suggestions for Crunchy Chicken Caesar Sandwich
Complete your sandwich experience with these perfect pairings:
- Sides: Crispy sweet potato fries, classic Caesar salad (for true Caesar lovers!), or a light cucumber and tomato salad to balance the richness
- Beverages: Sparkling water with lemon, unsweetened iced tea, or lemonade
- Dessert: Fresh berries with whipped cream or a small scoop of lemon sorbet for a refreshing finish
For a complete meal, consider serving smaller sandwich portions as part of a “soup and sandwich” combo with tomato bisque or Italian wedding soup.
FAQs About Crunchy Chicken Caesar Sandwich
Q: Can I make this sandwich gluten-free?
A: Absolutely! Use gluten-free breadcrumbs and your favorite gluten-free bread or wrap. Just verify your Caesar dressing is also gluten-free, as some contain wheat-based ingredients.
Q: How do I keep my sandwich crunchy in a packed lunch?
A: Pack components separately and assemble at lunchtime. Use a container with dividers or small separate containers for wet ingredients like dressing. Toast your bread right before leaving home.
Q: What’s the best way to reheat leftover crispy chicken without it getting soggy?
A: Avoid microwaving! Reheat in a 350°F oven for 5-7 minutes or use an air fryer at 325°F for 3-4 minutes to restore crispiness.
Q: Can I prepare the chicken in advance for a party?
A: Yes! Cook chicken completely, cool on a wire rack, then refrigerate. Reheat at 300°F for 10-15 minutes until warmed through and crispy again. Set up a build-your-own sandwich bar for entertaining.
Q: How can I make this sandwich healthier?
A: Use whole grain bread, bake the chicken instead of frying, opt for a yogurt-based Caesar dressing, and load up on extra vegetables like tomatoes, cucumbers, and sprouts.
Conclusion
The Crunchy Chicken Caesar Sandwich might seem simple, but these five variations prove how versatile this classic can be. Whether you’re craving something traditional or adventurous, there’s a version that will satisfy your hunger and impress your taste buds.
I’d love to see your creations! Tag @foodydish on social media when you make your own version. And remember great food brings people together, so don’t hesitate to share these recipes with friends and family.
Ready for more mealtime inspiration? Check out our related recipes:
Happy cooking!
Print
Crunchy Chicken Caesar Sandwich: 5 Mouthwatering Ways to Enjoy
- Total Time: 35 mins
- Yield: 4 sandwiches 1x
Description
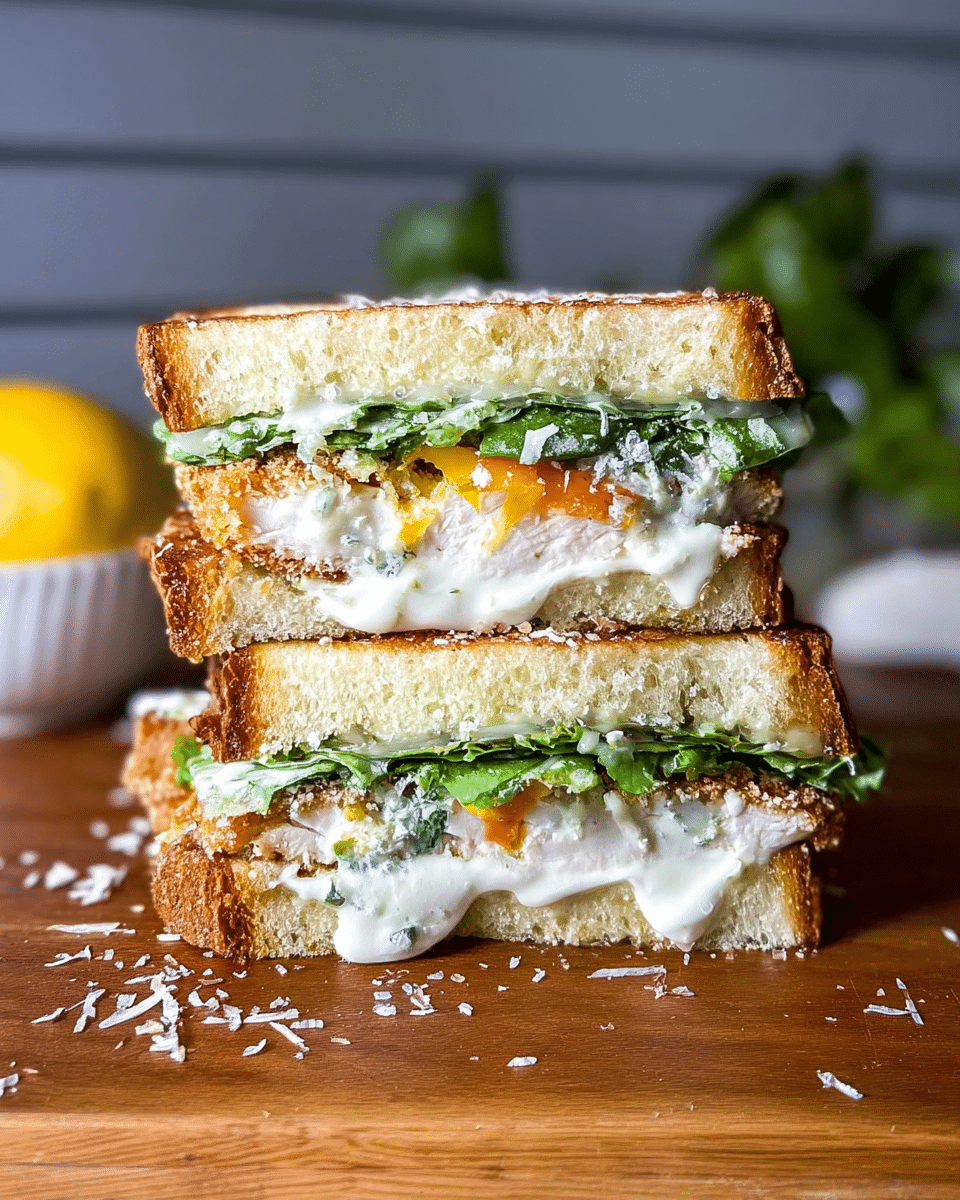
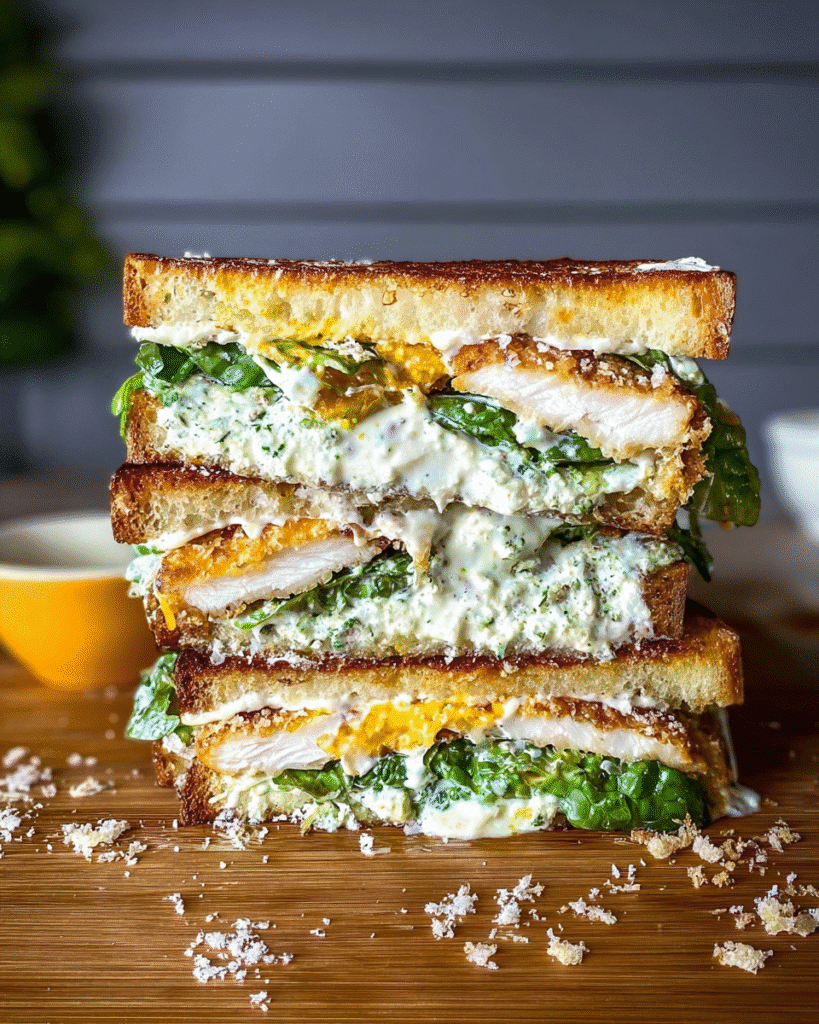
A crispy chicken Caesar sandwich loaded with crunchy breaded chicken, crisp romaine lettuce, Parmesan cheese, and creamy Caesar dressing all tucked into a toasted bun for the ultimate flavor and texture combo.
Ingredients
2 boneless, skinless chicken breasts
1 cup all-purpose flour
2 eggs, beaten
1 1/2 cups panko breadcrumbs
1/2 tsp salt
1/4 tsp black pepper
1/4 tsp garlic powder
1/4 tsp paprika
1/4 cup vegetable oil (for frying)
4 sandwich buns, toasted
1 1/2 cups chopped romaine lettuce
1/4 cup grated Parmesan cheese
1/3 cup Caesar dressing
Optional: sliced tomatoes or crispy bacon
Instructions
1. Pound chicken breasts to even thickness and cut each in half for sandwich-sized portions.
2. Set up a breading station: one plate with flour, one with beaten eggs, and one with seasoned panko breadcrumbs (salt, pepper, garlic powder, paprika).
3. Coat each chicken piece in flour, dip in egg, and press into breadcrumbs until well coated.
4. Heat oil in a skillet over medium heat and fry chicken for 4–5 minutes per side, or until golden brown and fully cooked.
5. Transfer to a paper towel-lined plate to drain excess oil.
6. In a small bowl, toss chopped romaine with Caesar dressing and Parmesan cheese.
7. Assemble the sandwiches: place crispy chicken on the bottom bun, top with Caesar salad mixture, and add optional tomato or bacon if desired.
8. Cover with the top bun and serve immediately.
Notes
For an air-fryer version, cook breaded chicken at 400°F (200°C) for 10–12 minutes, flipping halfway.
Use brioche or ciabatta buns for extra texture and flavor.
Add a drizzle of extra Caesar dressing or a squeeze of lemon for brightness.
- Prep Time: 15 mins
- Cook Time: 20 mins
- Category: Sandwich
- Method: Fried
- Cuisine: American
Nutrition
- Serving Size: 1 sandwich
- Calories: 620
- Sugar: 4g
- Sodium: 880mg
- Fat: 34g
- Saturated Fat: 7g
- Unsaturated Fat: 25g
- Trans Fat: 0g
- Carbohydrates: 44g
- Fiber: 2g
- Protein: 35g
- Cholesterol: 120mg
Keywords: chicken caesar sandwich, crispy chicken sandwich, caesar salad sandwich, chicken parmesan sandwich