introduction
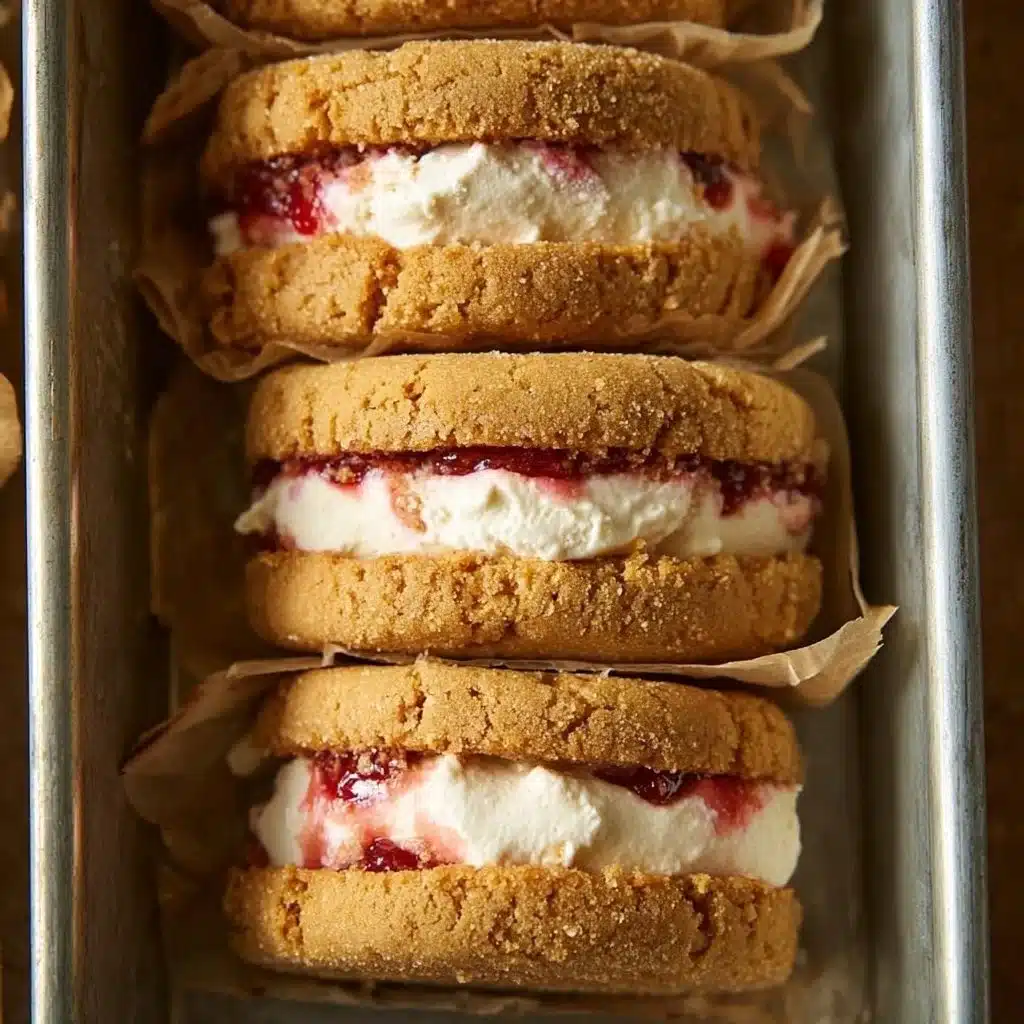
Peanut Butter & Jelly Ice Cream Sandwiches are a delightful treat that combines the classic flavors of a nostalgic childhood favorite with a cool and creamy twist. Whether you want something sweet for a hot day or a special dessert for a gathering, these ice cream sandwiches hit the spot. They are simple to prepare, allowing you to indulge in a little nostalgia while enjoying a refreshing snack.
why make this recipe
This recipe is not only easy to make but also offers an enjoyable way to satisfy your sweet tooth. Peanut Butter & Jelly Ice Cream Sandwiches are perfect for all ages, making them a family-friendly dessert option. By making these sandwiches, you can customize the ingredients to suit your taste. Do you love crunchy peanut butter? Use that instead. Prefer grape instead of strawberry jelly? Go for it! The possibilities are endless, encouraging creativity in the kitchen. Plus, these sandwiches are great for parties, picnics, or simply as a fun treat for yourself.
how to make Peanut Butter & Jelly Ice Cream Sandwiches
Making Peanut Butter & Jelly Ice Cream Sandwiches is a straightforward process. Here’s how you can put this delicious dessert together.
Ingredients:
- 2 slices of bread
- 2 tablespoons peanut butter
- 2 tablespoons jelly or jam
- 1 cup vanilla ice cream
- Optional: crushed nuts or sprinkles for coating
Directions:
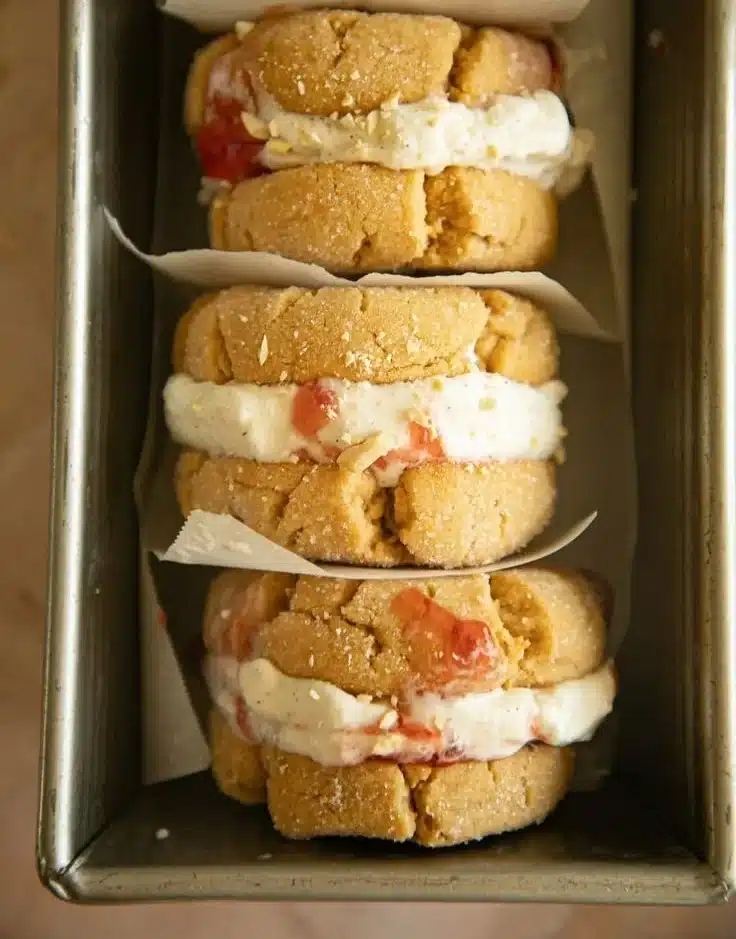
Spread the Peanut Butter and Jelly: Start by taking two slices of bread. On one slice, spread about 2 tablespoons of peanut butter evenly. On the other slice, spread 2 tablespoons of your favorite jelly or jam. This step is where you can choose your preferred flavors.
Add the Ice Cream: Next, take a generous scoop of vanilla ice cream, about one cup, and place it in the center of the jelly-covered bread slice. Try to keep the ice cream mound somewhat centered for an equal sandwich.
Assemble the Sandwich: Carefully place the slice with the peanut butter on top of the ice cream and gently press down. You want the sandwich to stick together, but not too hard that the ice cream spills out.
Optional Coating: If you like a little texture and added flavor, you can roll the edges of the sandwich in crushed nuts or colorful sprinkles. This step is optional, but it adds a festive and fun touch to your dessert.
Freeze the Sandwich: To make sure everything stays together and to firm up the ice cream, place your assembled sandwich in the freezer. Let it chill for about 30 minutes. This step is crucial for preventing a messy eating experience.
how to serve Peanut Butter & Jelly Ice Cream Sandwiches
When it’s time to serve your Peanut Butter & Jelly Ice Cream Sandwiches, take them out of the freezer and allow them to sit at room temperature for a minute. This helps soften the ice cream just enough to make cutting easier.
You can slice the sandwich in half or quarters if you want to share or enjoy smaller bites. Serve them on a plate, and if you went with sprinkles or nuts, make sure to showcase those colorful edges. For an extra touch, you could serve these sandwiches with a glass of milk or a scoop of additional ice cream on the side.
how to store Peanut Butter & Jelly Ice Cream Sandwiches
To store any leftover Peanut Butter & Jelly Ice Cream Sandwiches, wrap each sandwich tightly in plastic wrap or aluminum foil. They can also be placed in an airtight container if you prefer. Make sure to keep them in the freezer, where they can last for up to one month.
When you are ready to enjoy a sandwich again, simply take one out of the freezer and let it sit at room temperature for a minute or two to soften before serving.
tips to make Peanut Butter & Jelly Ice Cream Sandwiches
Choose the Right Bread: For the best results, use a soft bread that isn’t too crusty. White, whole wheat, or even brioche works well! The softer the bread, the easier it will be to bite into the sandwich.
Let Ice Cream Soften: Allow the ice cream to soften for a few minutes before scooping. This makes it easier to mold into a scoop.
Use Fresh Ingredients: Fresh peanut butter and jelly enhance the flavor of your sandwiches. Natural or organic options can also provide a more authentic taste.
Experiment with Flavors: Don’t be afraid to be adventurous! Try different flavored ice creams like chocolate or strawberry, or opt for almond butter instead of peanut butter.
Make Ahead: If you are hosting, consider making these sandwiches a few hours in advance to ensure you are not rushed before serving.
variation
You can get creative with this recipe in several different ways. Here are some variations you might want to try:
Cookie Variation: Instead of bread, use cookies to create an ice cream sandwich. Chocolate chip or oatmeal cookies are excellent choices.
Different Nut Butters: Swap out peanut butter for almond or cashew butter for a different flavor.
Fruit Add-ins: Layer fresh slices of banana or strawberries inside the sandwich for an extra fruity kick.
Chocolate Dip: After assembling the sandwich and freezing it, dip half of the sandwich in melted chocolate and put it back in the freezer for a few minutes to set.
FAQs
Can I make these sandwiches in advance?
Yes! You can prepare Peanut Butter & Jelly Ice Cream Sandwiches ahead of time. They can be stored in the freezer for up to a month, making them a great option for spontaneous cravings.
What type of bread works best for these sandwiches?
Soft breads like white, whole wheat, or brioche are the best choices. Sturdier breads may make biting into the sandwich difficult, especially since they contain ice cream.
Can I use other types of ice cream?
Absolutely! While this recipe calls for vanilla ice cream, you can use any flavor you like. Experiment with chocolate, strawberry, mint, or any seasonal flavors to find your new favorite combination.
What if I don’t have jelly?
If you do not have jelly or prefer not to use it, try using fresh fruit like sliced strawberries, bananas, or even a fruit puree. This will give you a fresh flavor without the need for jelly.
How can I make these sandwiches healthier?
For a healthier version, consider using whole-grain bread, natural nut butters with no added sugars, and low-fat or dairy-free ice cream options. You can also add more fruit slices for added nutrients.
With these simple steps and tips, you can enjoy your delicious, homemade Peanut Butter & Jelly Ice Cream Sandwiches any day of the week!
Print
Peanut Butter & Jelly Ice Cream Sandwiches
- Total Time: 45 minutes
- Yield: 2 servings 1x
- Diet: Vegetarian
Description
A delightful treat combining the classic flavors of peanut butter and jelly with a cool and creamy ice cream twist.
Ingredients
- 2 slices of bread
- 2 tablespoons peanut butter
- 2 tablespoons jelly or jam
- 1 cup vanilla ice cream
- Optional: crushed nuts or sprinkles for coating
Instructions
- Spread the peanut butter and jelly: Take two slices of bread. On one slice, spread 2 tablespoons of peanut butter evenly. On the other slice, spread 2 tablespoons of your favorite jelly or jam.
- Add the ice cream: Take a generous scoop of vanilla ice cream, about one cup, and place it in the center of the jelly-covered bread slice.
- Assemble the sandwich: Carefully place the slice with the peanut butter on top of the ice cream and gently press down.
- Optional coating: Roll the edges of the sandwich in crushed nuts or colorful sprinkles if desired.
- Freeze the sandwich: Place your assembled sandwich in the freezer and let it chill for about 30 minutes.
Notes
For best results, use soft bread and allow ice cream to soften before scooping.
- Prep Time: 15 minutes
- Cook Time: 30 minutes
- Category: Dessert
- Method: No-Cook
- Cuisine: American
Nutrition
- Serving Size: 1 sandwich
- Calories: 350
- Sugar: 25g
- Sodium: 300mg
- Fat: 15g
- Saturated Fat: 5g
- Unsaturated Fat: 8g
- Trans Fat: 0g
- Carbohydrates: 45g
- Fiber: 2g
- Protein: 8g
- Cholesterol: 10mg
Keywords: dessert, ice cream sandwiches, peanut butter and jelly, easy dessert, no-bake